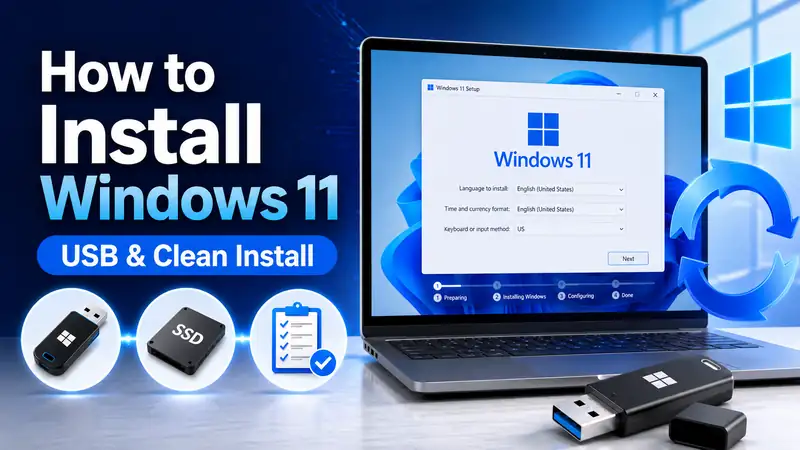
How to Create a Windows 11 Bootable USB | Media Creation Tool & Rufus Step by Step
If you’re creating a Windows 11 bootable USB for the first time, Microsoft’s Media Creation Tool is the simplest place to start. All you need is a working Windows PC with a reliable internet connection and a blank USB flash drive with at least 8GB of space. From Microsoft’s official Windows 11 download page, you can run the Media Creation Tool, choose Create installation media for another PC → USB flash drive, and let the tool download Windows 11 and prepare the USB automatically.
If you already have an official Windows 11 ISO or want to reuse the same ISO for several drives, Rufus gives you more control. For most standard Intel- or AMD-based Windows 11 PCs, however, Microsoft’s tool is still the easiest default. Arm64 devices are different: Microsoft currently says the Media Creation Tool cannot create Arm64 installation media, so Snapdragon-based PCs may require an official Arm64 ISO, Rufus, or recovery media supplied by the PC manufacturer.
What this guide covers: creating a Windows 11 bootable USB for a clean install, reinstall, or access to Windows recovery options. Boot-order settings, USB formatting, boot verification, and troubleshooting are treated as separate steps so you can follow only the part you need.
▸ An installation USB and a recovery drive are not the same thing
A Windows installation USB contains Windows Setup files and is mainly used for a new installation, clean installation, or reinstall. A recovery drive is created through Windows Recovery Drive and is intended primarily to recover a specific PC or restore recovery tools. A Windows 11 bootable USB can also open recovery options through Windows Setup, but the two types of media are created differently and serve different primary purposes.
① Choose the Right Method for a Windows 11 Bootable USB
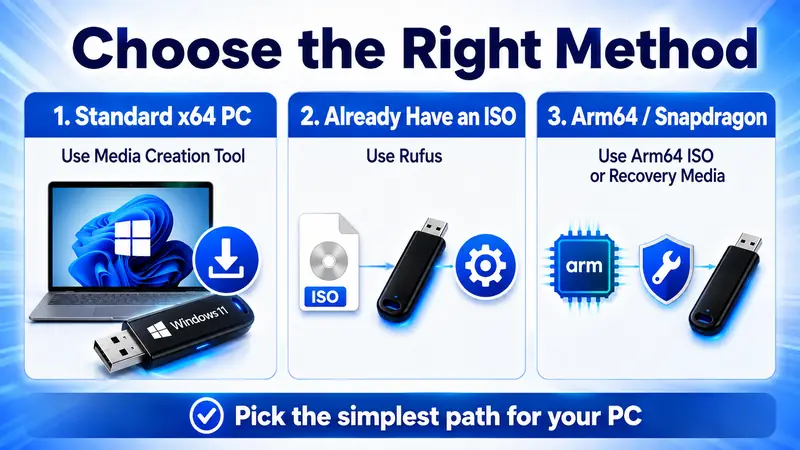
There are several ways to create a Windows 11 bootable USB, but beginners do not need to learn all of them. The best Windows 11 bootable USB method depends mainly on your processor architecture and whether you already have an ISO. Pick the path that matches your PC and the files you already have.
| Situation | Recommended method | Why it fits | Difficulty |
|---|---|---|---|
| First Windows 11 USB for a standard Intel/AMD PC | Microsoft Media Creation Tool | Downloads Windows and prepares the bootable drive automatically | Easiest |
| You already have an official ISO or want to reuse one ISO | Rufus + Windows 11 ISO | Lets you select and write the ISO directly to USB | Moderate |
| You need media for a Snapdragon or other Windows on Arm PC | Manufacturer recovery media first; Arm64 ISO + Rufus if appropriate | Media Creation Tool does not currently create Arm64 bootable media | Moderate to advanced |
| Enterprise deployment or custom WinPE | Windows ADK / WinPE tools | Designed for deployment workflows rather than a normal home installation USB | Advanced |
The key is not choosing the tool with the most features. It is choosing the simplest tool that fits your job. If you’re making one Windows 11 bootable USB for a supported x64 PC, the Media Creation Tool is usually the best place to begin.
② What You Need Before You Start — The USB Will Be Erased
Creating a Windows 11 bootable USB is straightforward, but selecting the wrong drive can erase the wrong storage device. A safe Windows 11 bootable USB workflow starts by confirming the drive, architecture, and backup status before you click anything destructive. Check these items before you begin.
| Item | Recommended state | Why it matters |
|---|---|---|
| USB flash drive | Blank drive with at least 8GB | Existing contents can be deleted during media creation |
| Working PC | A stable Windows PC | Needed to run the tool and download Windows files |
| Internet connection | Reliable and uninterrupted | Required for downloading Windows installation files |
| Target architecture | Confirm x64 or Arm64 | Media Creation Tool creates x64 installation media only |
| Important files | Back up anything you need from both the PC and USB | A later clean install or partition change can remove data |
| Windows license and edition | Know whether the PC uses Home, Pro, or another eligible edition | The installed edition must match the device’s license for normal activation |
For a Windows 11 bootable USB, Microsoft specifies a blank USB flash drive with at least 8GB of space and warns that its existing contents will be deleted. Many modern PCs activate Windows through a digital license or a product key stored in firmware, so Setup may not ask you to type a key. The edition still needs to match the license associated with the PC.
Microsoft: Create installation media for Windows
Related guide: Windows 11 Backup Guide — Back Up Files Before Reinstalling
③ The Easiest Way: Create a Windows 11 Bootable USB with Media Creation Tool
For a standard Intel- or AMD-based Windows 11 PC, this is the simplest route to a Windows 11 bootable USB. Microsoft handles the Windows download and the USB setup for you.
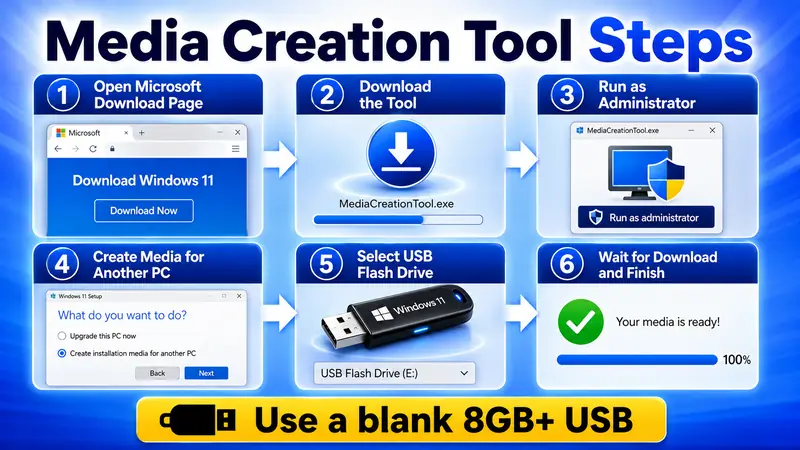
- On a working Windows PC, open the official Windows 11 download page.
- Under Create Windows 11 Installation Media, select Download Now.
- Run the downloaded MediaCreationTool.exe. Administrator permission is required.
- Review the license terms and select Accept.
- Choose Create installation media for another PC, then continue.
- Confirm the Windows 11 language, edition, and 64-bit architecture.
- For the media type, select USB flash drive.
- Choose the correct USB by checking its name and capacity carefully.
- Keep the PC online and leave the USB connected while Windows downloads and the drive is prepared.
- When the completion message appears, close the tool and safely remove the USB.
Double-check the USB capacity before you continue
When you create a Windows 11 bootable USB, the drive you select can be erased. If several USB drives or external SSDs are connected, disconnect the ones you do not need before starting. This makes it much harder to select the wrong device while creating the Windows 11 bootable USB.
④ Which Windows 11 Version Does the Tool Create in 2026?
As of August 25, 2026, Microsoft’s public Windows 11 download page lists Windows 11 2025 Update, version 25H2, as the current release for the normal Windows 11 bootable USB download path. The Media Creation Tool follows Microsoft’s current public installation-media channel, so there is no reason to download an unofficial ISO simply because a site advertises a newer-sounding build.
You may also see references to Windows 11 version 26H1. Microsoft says 26H1 is intended for select new devices based on next-generation hardware and is not designed to be offered or installed as an in-place update on existing 24H2 or 25H2 PCs. In other words, 26H1 does not replace the normal 25H2 public download path for a typical existing x64 PC.
Because Microsoft’s public release changes over time, always check the Current release label on the official Windows 11 download page when you make a new Windows 11 bootable USB. Insider and preview builds serve a different purpose from normal stable installation media.
⑤ What If You Choose the Wrong Language or Edition?
A Windows 11 bootable USB is not useful just because it starts successfully. A reliable Windows 11 bootable USB also needs the correct Windows language, architecture, and edition for the target PC. The Windows language and edition also need to make sense for the target PC.
- Language: Microsoft recommends choosing the same language you use on the PC you plan to install.
- Edition: A PC licensed for Windows 11 Home normally needs Home; a Pro license normally activates Pro.
- Product key: Many newer systems use a firmware-embedded key or digital license, so Windows Setup may not ask for manual key entry.
- USB creation and activation are separate: Making installation media does not create a new Windows license.
If you are preparing a Windows 11 bootable USB on one PC for use on another, do not blindly keep settings simply because they are recommended for the current computer. Confirm the target PC’s language and processor architecture first.
⑥ Have an ISO? Create a Windows 11 Bootable USB with Rufus
If you already downloaded an official Windows 11 ISO, or you need to create several USB drives from the same ISO, Rufus is an efficient way to build a Windows 11 bootable USB. Rufus is a free, open-source utility that can create bootable USB media from ISO images.
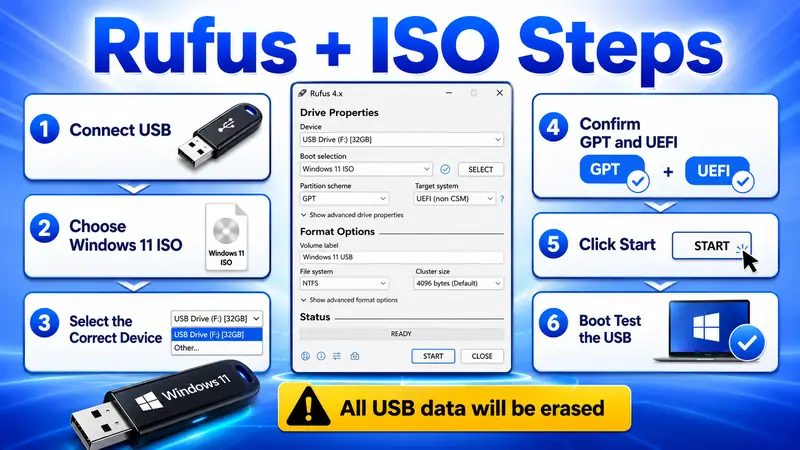
- Download Rufus from the official Rufus website.
- Connect the USB you want to use and open Rufus.
- Under Device, select the correct USB drive.
- Under Boot selection, choose your official Windows 11 ISO.
- For a normally supported modern Windows 11 PC, confirm GPT as the partition scheme and UEFI as the target system when those settings match the target PC.
- Unless you have a specific reason to change them, review the volume label and file-system values suggested by Rufus.
- Select Start.
- Read the warning that the USB’s data will be destroyed, then continue only if the correct drive is selected.
- If Rufus shows Windows User Experience options, enable only the options whose effect you understand.
- When Rufus reports that the drive is ready, close the program and perform a real boot test.
| Rufus setting | Typical Windows 11 PC | What to watch |
|---|---|---|
| Device | Select the exact USB drive | Choosing an external SSD by mistake can destroy its data |
| Boot selection | Official Windows 11 ISO | Avoid modified ISOs from unknown sources |
| Partition scheme | Usually GPT | Match the target PC’s UEFI configuration |
| Target system | UEFI | Do not treat Legacy/CSM as the default for a normal supported Windows 11 system |
| Windows User Experience options | Keep normal Windows 11 requirements unless you have a specific reason to change them | Bypassing hardware requirements can affect support and compatibility |
Do not treat unsupported-PC bypass options as the default
Rufus can display additional Windows setup options, including options that change or remove some Windows 11 requirements. This guide assumes a PC that officially meets the Windows 11 requirements. Microsoft does not recommend installing Windows 11 on hardware that does not meet its minimum requirements, and compatibility or support issues can follow.
⑦ Downloaded the ISO Yourself? Verify Its SHA256 Hash
When you use Rufus with an ISO you downloaded manually, there is one extra check worth doing before you create the Windows 11 bootable USB: confirm that the ISO matches Microsoft’s published SHA256 hash.
Get-FileHash "C:\Users\YourName\Downloads\Windows11.iso" -Algorithm SHA256Microsoft’s Windows 11 download page provides a Verify your download section, which is especially useful when your Windows 11 bootable USB is being created from a manually downloaded ISO. Run the command in PowerShell, then compare the calculated hash with the value Microsoft lists for the same ISO language. A matching SHA256 value is strong evidence that the downloaded ISO was not corrupted or altered.
That check validates the ISO file, not the finished USB. After Rufus creates the Windows 11 bootable USB, you should still verify that the target PC can actually boot from it and reach Windows Setup.
⑧ Using an Arm64 Windows PC? Follow a Different Path
Snapdragon-based Windows on Arm devices do not follow the same Windows 11 bootable USB path as a typical x64 PC. Microsoft currently provides official Windows 11 Arm64 ISOs, but the Windows Media Creation Tool does not create an Arm64 Windows 11 bootable USB.
- Start with the manufacturer: Check whether your PC maker provides official recovery media. This is often the safest option because it includes drivers tested for that exact device.
- If you need to build your own media: Download the official Windows 11 Arm64 ISO from Microsoft.
- Create the USB: Microsoft documents using a tool such as Rufus to write the Arm64 ISO to a USB drive.
- Older Snapdragon devices: Some may require manufacturer drivers to be added to the installation media before the device can boot or provide working input.
- Snapdragon X Series: Microsoft says these devices can boot from the ISO without adding manufacturer drivers first, although additional drivers may still be needed after installation for full functionality.
Microsoft Learn: Windows 11 Arm ISO files
⑨ After Creating the USB, Test the Actual Boot Process
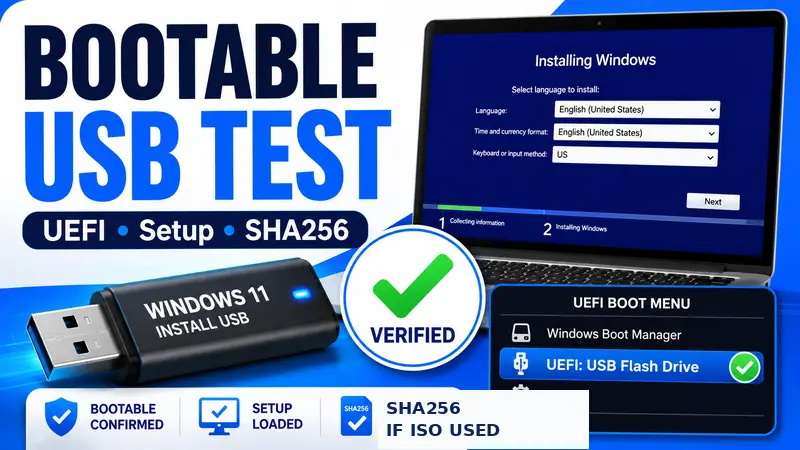
Do not put the Windows 11 bootable USB away just because Media Creation Tool or Rufus says it is finished. A Windows 11 bootable USB should be tested at least once on the target PC, because a Windows 11 bootable USB is only useful if the firmware can actually start it.
- Connect the USB to the target PC.
- Shut the PC down completely, then turn it back on.
- Open the manufacturer’s Boot Menu using the appropriate startup key.
- On a modern Windows 11 PC, select the UEFI USB entry when available.
- Confirm that Windows Setup reaches the first language or keyboard screen.
- If you are only testing the USB, stop there. Do not continue into installation or change partitions.
Related guide: How to Check Whether a Windows Bootable USB Works
Need to change the boot device? See: How to Configure Windows USB Boot Settings
⑩ If the Windows 11 Bootable USB Will Not Boot, Check These First
- Confirm that Windows still recognizes the Windows 11 bootable USB normally.
- Try a different USB port and connect the drive directly rather than through a hub.
- Check whether the Boot Menu shows the USB or a UEFI USB entry.
- Confirm that Media Creation Tool or Rufus completed without errors.
- If you used an ISO, recheck the source and SHA256 value.
- Try another USB flash drive to rule out failing media.
- If Windows Setup starts but the internal SSD is missing, separate that from a USB-boot problem; storage-controller drivers or firmware settings may be the real cause.
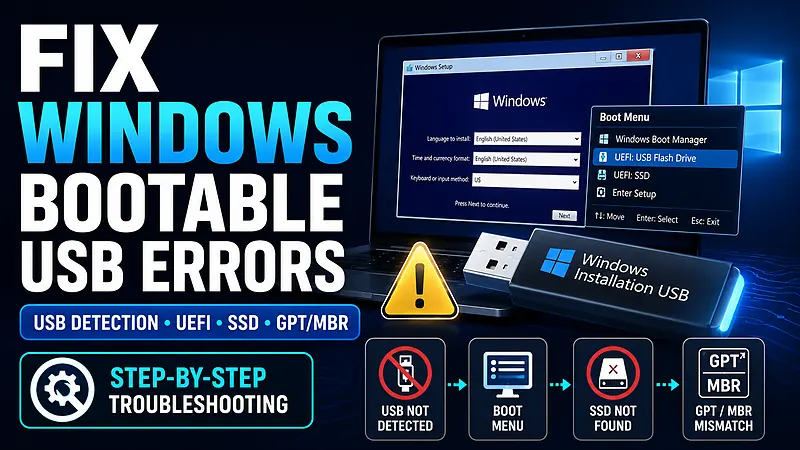
If the problem continues: Windows Bootable USB Troubleshooting — USB Detection, UEFI, SSD and Setup Errors
⑪ Common Mistakes Beginners Make
- Using a USB that still contains important files when creating a Windows 11 bootable USB: Media Creation Tool and Rufus can erase the drive.
- Mistaking an external SSD for the target USB: Always verify both the device name and capacity.
- Assuming a formatted USB is automatically bootable: A Windows 11 bootable USB must contain the installation files and a valid boot structure.
- Copying the ISO file onto the USB as a single file: Simply copying an ISO is not the same as creating a Windows 11 bootable USB with a valid boot structure.
- Using a modified ISO from an unknown source: Prefer Microsoft’s official ISO.
- Choosing Legacy/CSM as if it were the Windows 11 default: Supported modern Windows 11 PCs are normally configured around UEFI.
- Ignoring x64 vs Arm64: Check the target PC’s system type before you create the media.
- Skipping the boot test: Reaching the first Windows Setup screen is the clearest practical confirmation that the USB works.
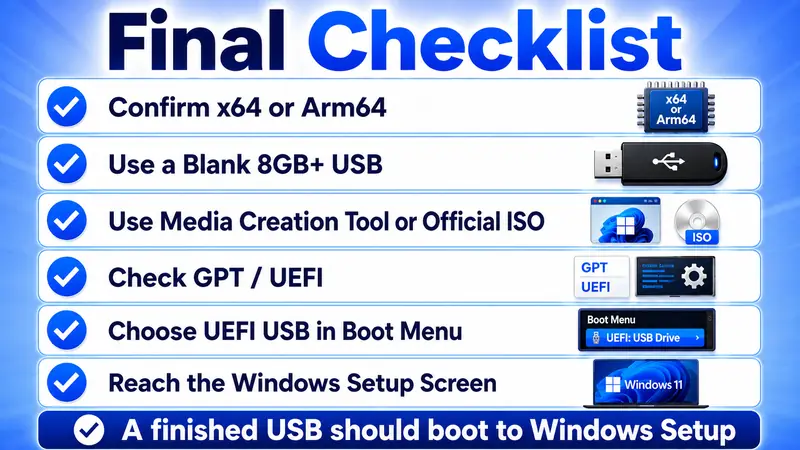
⑫ Final Windows 11 Bootable USB Checklist
- Before creating the Windows 11 bootable USB, confirm whether the target PC is x64 or Arm64.
- Back up any important files on the USB before you begin.
- For a normal x64 PC, consider Media Creation Tool first.
- If you use an ISO, download it from Microsoft.
- With Rufus, verify the exact target USB before clicking Start.
- For a supported modern Windows 11 PC, confirm GPT and UEFI where appropriate.
- Do not disconnect the USB or cut power while the drive is being created.
- After creation, verify that the USB appears in the Boot Menu.
- Boot far enough to reach the first Windows Setup screen.
The most important part of creating a Windows 11 bootable USB is not seeing a “finished” message. It is making the correct installation media on the correct drive and then confirming that the target PC can actually boot from it.
❓ Frequently Asked Questions
Q. How large does a USB drive need to be for Windows 11?
A. For a Windows 11 bootable USB, Microsoft specifies a blank USB flash drive with at least 8GB of space for the Media Creation Tool. The drive can be erased during the process, so do not use one that still contains important files.
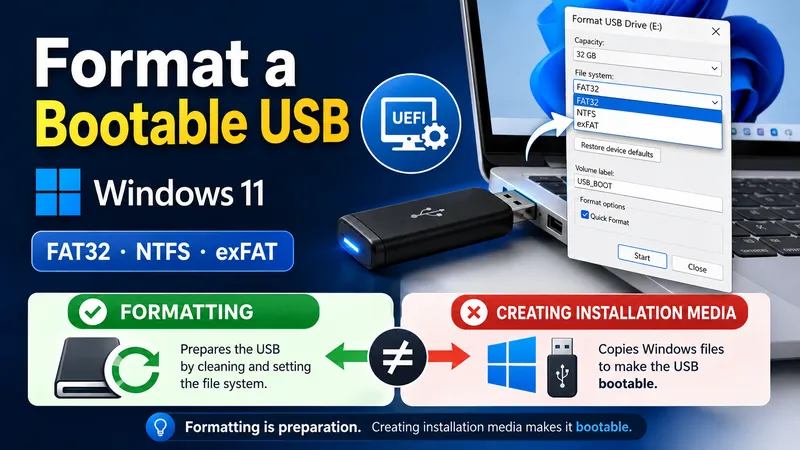
Q. Do I need to format the USB as FAT32 first?
A. Not when you use the Media Creation Tool. It prepares the drive as part of the media-creation process. If you are building bootable media manually or using another tool, file-system and UEFI requirements need to be considered separately.
Q. Is Media Creation Tool or Rufus better?
A. For a first Windows 11 bootable USB on a supported x64 PC, Media Creation Tool is usually simpler. Rufus is useful when you already have an ISO, want to reuse the same ISO, need more control over the USB configuration, or are working with an Arm64 ISO.
Q. Can I just copy the Windows 11 ISO file to a USB?
A. In normal use, copying the ISO as a single data file does not turn the drive into Windows installation media. Use Media Creation Tool, Rufus, or another proper bootable-media method.
Q. Do I need separate USB drives for Windows 11 Home and Pro?
A. Microsoft’s consumer Windows 11 ISO can be multi-edition, and Setup can select or activate the appropriate edition based on the product key or digital license. What matters is that the installed edition matches the license associated with the PC.
Q. Can a Snapdragon laptop use Media Creation Tool?
A. Not for creating an Arm64 Windows 11 bootable USB. Microsoft currently states that the Windows 11 Media Creation Tool creates x64 installation media only. For an Arm-based PC, check manufacturer recovery media first, then consider Microsoft’s official Arm64 ISO and a tool such as Rufus if needed.
Conclusion: Media Creation Tool First, Rufus When You Need an ISO Workflow
If this is your first Windows 11 bootable USB, keep the process simple. A Windows 11 bootable USB made with Microsoft’s own tool is the most straightforward choice for a typical supported x64 PC: use a working Windows PC, a blank USB with at least 8GB, and Microsoft’s Media Creation Tool. The tool handles the Windows download and prepares the installation media for you.
If you already have Microsoft’s ISO or want to create several USB drives from the same image, Rufus is the more flexible option. Verify the ISO source, check its SHA256 value when appropriate, confirm the correct target USB, and use GPT/UEFI settings that match a supported modern Windows 11 PC.
Arm64 devices need a different path because the Media Creation Tool does not currently create Arm64 bootable media. Whichever method you use, the last step is the same: boot from the USB and make sure Windows Setup reaches its first screen before you consider the drive ready.
Next in the series: Windows Update Troubleshooting — Causes and Step-by-Step Fixes