How to Check If a Windows 11 USB Is Bootable | UEFI & Setup Verification Guide
The most reliable bootable USB test is to start the PC from the Windows 11 installation USB and make sure Windows Setup reaches its first screen. Seeing the drive in File Explorer—and even seeing files such as setup.exe, boot, efi, and sources—only proves that Windows can read the media. It does not fully prove that the PC firmware can use that USB as a boot device.
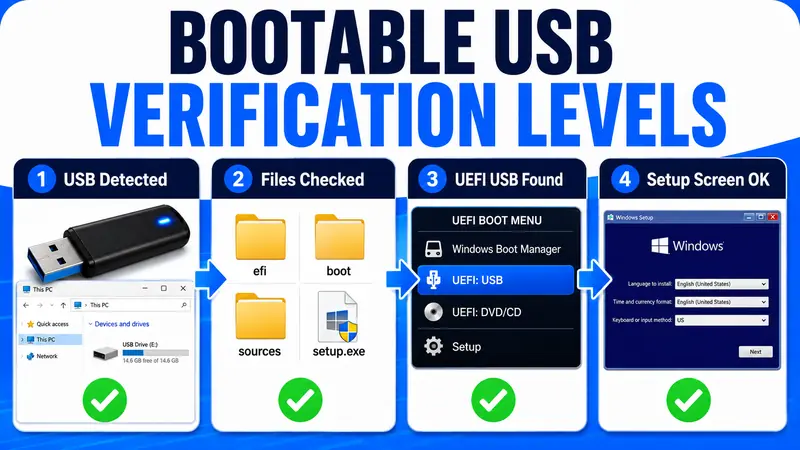
For a practical bootable USB test, work through four levels in order: USB detection → installation-file structure → UEFI entry in the Boot Menu → Windows Setup actually loading. If you created the drive from a manually downloaded ISO, add a SHA256 check so you can also confirm that the source ISO was not corrupted or altered.
What this guide covers: verifying an existing Windows 11 installation USB before you rely on it for a clean install, reinstall, or recovery. Formatting the USB, creating a new one, and fixing boot errors are separate tasks and should be handled separately.
① Bootable USB Test: Four Levels of Verification
Not every check proves the same thing. Seeing a USB drive in Windows is a basic storage check. Reaching the Windows Setup screen is a much stronger form of USB boot verification.
| Verification step | What it tells you | Confidence level |
|---|---|---|
| 1. USB appears in Windows | Windows can detect the device and read its file system | Basic |
| 2. Installation files and EFI structure are present | The drive contains the main components normally expected on Windows installation media | Moderate |
| 3. UEFI USB appears in the Boot Menu | The PC firmware recognizes the USB as a possible boot device | High |
| 4. Windows Setup loads | The current PC successfully boots from the USB and loads Windows Setup | Strongest practical check |
▸ Why actual USB boot verification matters
A USB can contain all the right-looking files and still fail before Windows Setup starts. Firmware may not recognize the drive correctly, a boot file may be damaged, or the USB itself may have read errors. Running one real USB startup check before you actually need the drive can save you from rebuilding it later. That is why the bootable USB test should end with Windows Setup, not File Explorer.
② First Bootable USB Test: Make Sure Windows Can Read the Drive
Start with the simplest Windows installation media check: confirm that Windows can detect the USB and open it normally.
- Connect the Windows installation USB to a working PC.
- Press Windows + E to open File Explorer.
- Open This PC and confirm that the USB drive appears.
- Check the drive name, drive letter, and total capacity.
- Open the USB and confirm that Windows installation files are visible.
- Do not randomly delete or replace files on a completed installation USB just to test it.
Microsoft recommends a blank USB flash drive with at least 8GB of space when creating Windows installation media, and the media-creation process erases the existing contents. Even when creation finishes successfully, that does not replace a real attempt to confirm the USB can boot on the target PC.
Microsoft: Create installation media for Windows
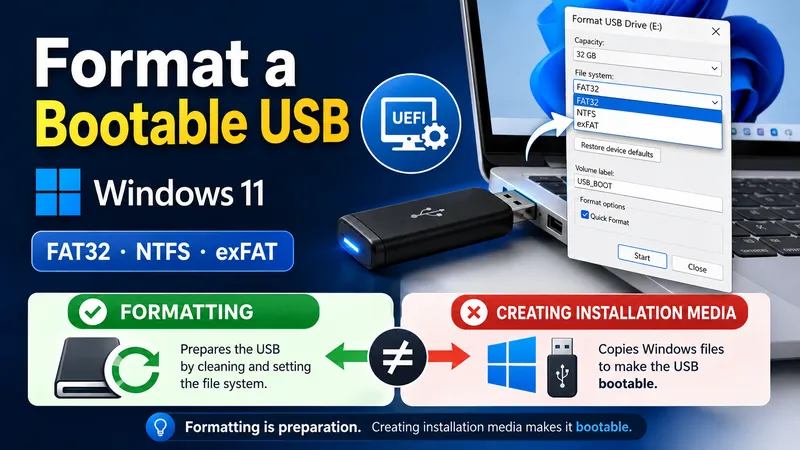
Related guide: How to Format a Windows Bootable USB Safely
③ Second Bootable USB Test: Inspect the Windows Installation Files
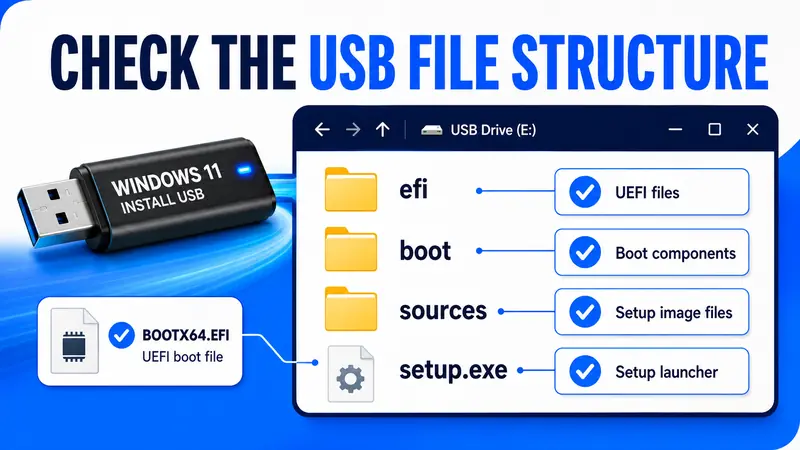
A normal Windows installation USB contains folders and boot components used by Windows Setup. The exact layout can vary depending on how the media was created and which Windows build is on it, but the following items are useful signs that the structure is broadly intact.
| Item | Purpose | What to look for |
|---|---|---|
efi | Contains files used for UEFI booting | An important folder on modern Windows 11 UEFI media |
boot | Contains Windows boot and setup components | A common core folder on installation media |
sources | Contains Windows Setup and installation-image files | boot.wim and an installation image such as install.wim or install.esd, depending on the media |
setup.exe | Starts Windows Setup from an already running Windows installation | Normally visible in the USB root |
bootmgr and related files | Boot components used in supported boot modes | Exact contents can vary by media-creation method |
Microsoft’s UEFI documentation gives \EFI\BOOT\BOOTX64.EFI as an example of the boot file used by x64 Windows Setup or Windows PE media on systems that require browsing to the UEFI boot file manually.
Important: this file-structure check is only one stage of verifying the Windows installation USB. A copy operation can fail, a drive can develop read errors, or the firmware can reject media that still looks normal in File Explorer.
File checks are useful for finding obvious problems
If the sources folder is empty, the efi folder is missing from media intended for normal Windows 11 UEFI use, or other core setup files are clearly absent, rebuilding the USB is usually the better option. If the structure looks normal, continue with UEFI boot verification instead of stopping here.
④ If You Used an ISO, Verify SHA256 Before the Bootable USB Test
If you downloaded a Windows 11 ISO yourself and then used Rufus or another manual workflow, verify the ISO before blaming the USB. Microsoft’s Windows 11 download page provides SHA256 values so you can check the integrity and authenticity of the ISO you downloaded.
Get-FileHash "C:\Users\YourName\Downloads\Windows11.iso" -Algorithm SHA256Run the command in PowerShell, then compare the result with Microsoft’s SHA256 value for the same ISO language. If the values match, Microsoft says that confirms the downloaded file has not been corrupted, tampered with, or altered from the original.
Microsoft: Download Windows 11 and verify an ISO
A matching hash is useful, but it does not complete the bootable USB test or verify the USB can boot. A correct ISO can still be written incorrectly, or the flash drive itself can fail, so the finished USB still needs a real startup check.
⑤ Third Bootable USB Test: Look for “UEFI: USB” in the Boot Menu
Now move beyond Windows and check whether the PC firmware recognizes the drive as a boot device. For a normal supported Windows 11 PC, UEFI is the preferred firmware mode.
- Leave the USB connected and shut the PC down completely.
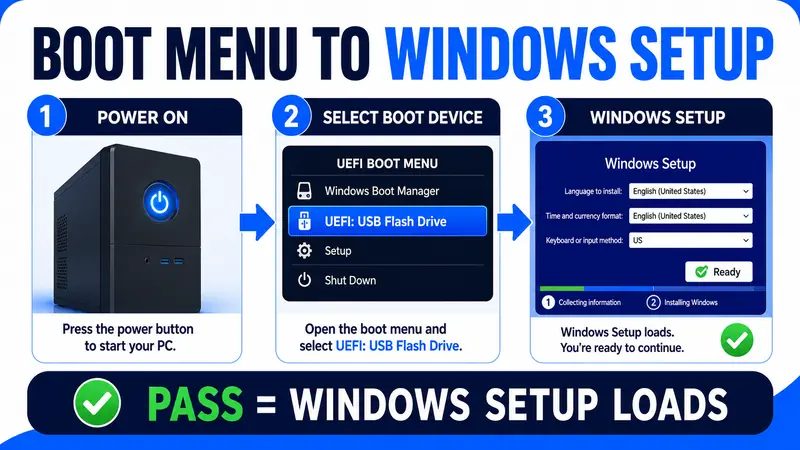
- Turn the PC on and press the manufacturer’s Boot Menu key.
- Find the USB drive in the list of boot devices.
- If the same USB appears more than once, prefer the entry labeled UEFI: USB or similar for a normal Windows 11 installation.
- Confirm that the firmware lets you select the USB as a boot target.
Microsoft’s firmware guidance uses UEFI: USB Drive as an example and notes that the same physical USB can sometimes appear twice—once for UEFI and once for BIOS/legacy boot. Selecting the UEFI entry is the normal choice for a modern Windows 11 bootable USB test.
Microsoft Learn: Boot to UEFI mode or legacy BIOS mode
Seeing the USB in the Boot Menu is a strong sign, not the final result
If the firmware lists the drive, that is stronger evidence than File Explorer alone and is an important UEFI boot verification step. But the bootable USB test is not complete until the drive actually starts Windows Setup.
⑥ Fourth Bootable USB Test: Boot to the Windows Setup Screen
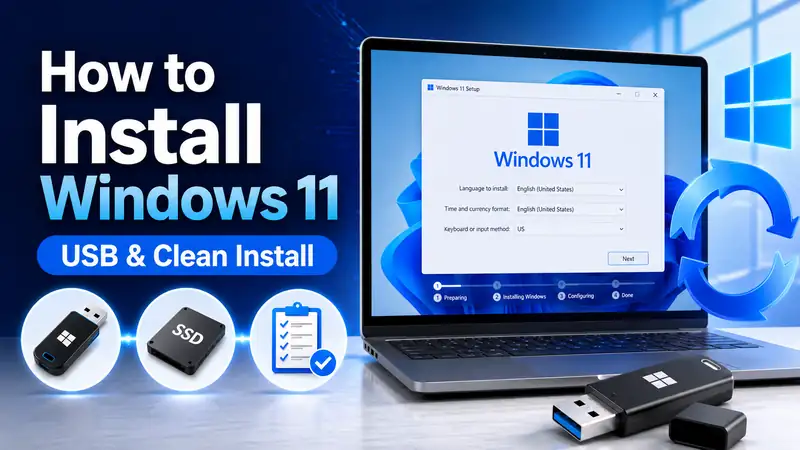
This is the most useful real-world bootable USB test. You do not have to install Windows; this is Windows Setup boot verification, not a full installation. You only need to confirm that the USB boots and Windows Setup loads far enough to show its first setup screen.
- Choose the UEFI USB entry from the Boot Menu.
- Wait for the Windows logo or setup-loading screen.
- Confirm that the first Windows Setup screen appears.
- If you are only testing the USB, stop here. There is no need to proceed to disk selection or installation.
- Shut the PC down, remove the USB, and confirm that the existing Windows installation still starts normally.
Microsoft’s reinstall guidance follows the same practical logic: start the PC from the installation media and confirm that Windows Setup launches. If the setup screen does not appear, Microsoft directs users to check the PC manufacturer’s boot-order or boot-device instructions.
Microsoft: Reinstall Windows with installation media
Need help choosing the boot device? How to Configure Windows USB Boot Settings
⑦ After a Successful Bootable USB Test, Separate USB Problems from Setup Problems
| Result | What it means | What to check next |
|---|---|---|
| USB appears only in Windows | Basic storage detection is working | Whether the Boot Menu recognizes it |
| UEFI USB appears in Boot Menu | Firmware recognizes it as a boot candidate | Whether Windows Setup actually loads |
| First Windows Setup screen loads normally | USB boot and Windows Setup loading work on this PC | SSD detection, partitions, and drivers if you plan to install |
| Setup loads but the SSD is missing | The USB itself may already be working correctly | Storage controller, VMD/RST, BIOS storage detection, or drivers |
| GPT/MBR error appears after Setup loads | The problem has moved beyond USB booting to disk/firmware configuration | UEFI boot mode and target-disk partition style |
If the bootable USB test reaches Windows Setup but the SSD does not appear, or Windows reports a GPT/MBR partition-style problem, separate that from the USB-boot question. Reformatting or recreating the USB immediately may waste time because the failure is now occurring later in the installation process. At that point, the USB boot verification has already succeeded.
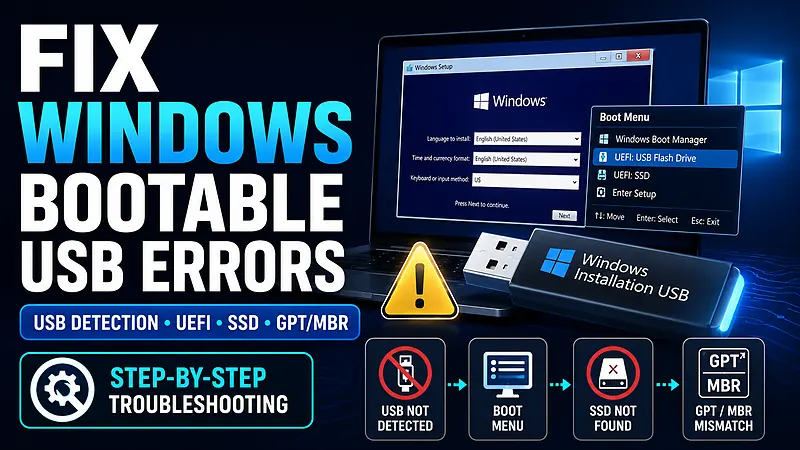
If that happens: Windows Bootable USB Troubleshooting — USB Detection, UEFI, SSD and Setup Errors
⑧ Advanced Bootable USB Test: Confirm WinPE Firmware Mode
Most home users do not need this advanced bootable USB test. Selecting UEFI: USB in the Boot Menu is usually enough. But technicians working in Windows PE can check the firmware mode directly.
reg query HKLM\System\CurrentControlSet\Control /v PEFirmwareTypeMicrosoft documents the return values as:
- 0x2 = UEFI
- 0x1 = BIOS
This check is mainly for deployment, repair, or service work and gives technicians a precise UEFI boot verification method. It is most useful when the same USB appears in both UEFI and legacy modes and you need to confirm exactly how WinPE started.
⑨ Include Architecture in Your Bootable USB Test: x64 vs Arm64
A USB can be perfectly healthy and still be wrong for the target PC, so a complete Windows installation media check also includes architecture. Windows 11 systems now include conventional Intel/AMD x64 PCs and Windows on Arm devices based on Snapdragon processors, so architecture belongs in a complete bootable USB test.
- Intel or AMD Windows 11 PC: use normal x64 Windows 11 installation media.
- Windows on Arm PC: use Windows 11 Arm64 media or manufacturer recovery media.
- Older Snapdragon systems: some models may require manufacturer-specific drivers in the boot media.
Microsoft currently provides Windows 11 Arm64 ISOs, but the Media Creation Tool does not create Arm64 bootable media. Microsoft also recommends manufacturer recovery media when available because it includes drivers tested for the specific device.
Microsoft Learn: Windows 11 Arm ISO files
⑩ Do Not Damage the USB While Running a Bootable USB Test
- Do not delete unfamiliar setup files: a file that looks unnecessary may be required for booting.
- Do not mix large amounts of unrelated data into the installation media: keeping the original structure intact makes troubleshooting easier.
- Check whether security software quarantined a setup file: if a drive worked immediately after creation but later stops booting, confirm that its contents did not change.
- Do not reformat the drive and copy only part of the files back: a partial copy is not valid installation media.
- Do not delete partitions on the internal SSD just to test the USB: loading the first Windows Setup screen is enough.
These precautions keep the bootable USB test focused on verification rather than accidentally changing the media you are trying to evaluate. They also make it easier to test the installation USB without introducing a new problem.
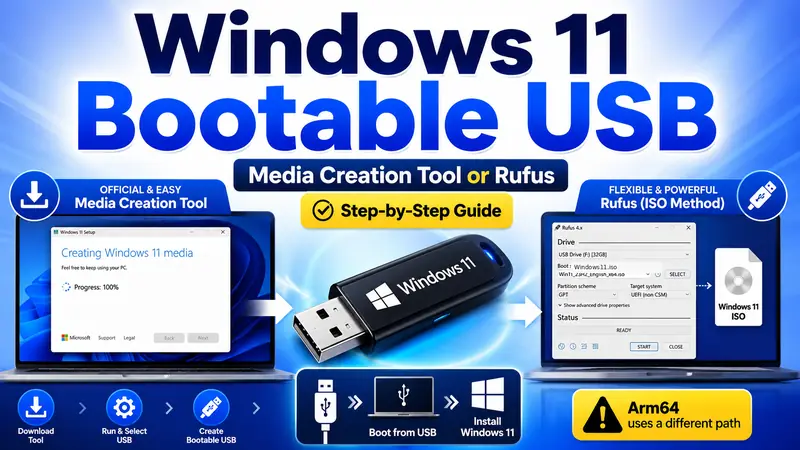
Need to rebuild the drive instead? How to Create a Windows 11 Bootable USB with Media Creation Tool and Rufus
⑪ Final Bootable USB Test Checklist
- The USB appears normally in File Explorer.
- Core installation folders such as
efi,boot, andsourcesare present. setup.exeis visible in the USB root.- If you downloaded an ISO manually, its SHA256 matches Microsoft’s published value.
- The USB appears as a boot device in the PC’s Boot Menu.
- On a normal Windows 11 PC, you selected the UEFI USB entry when available.
- The first Windows Setup screen loads successfully.
- The media architecture matches the target PC: x64 or Arm64.
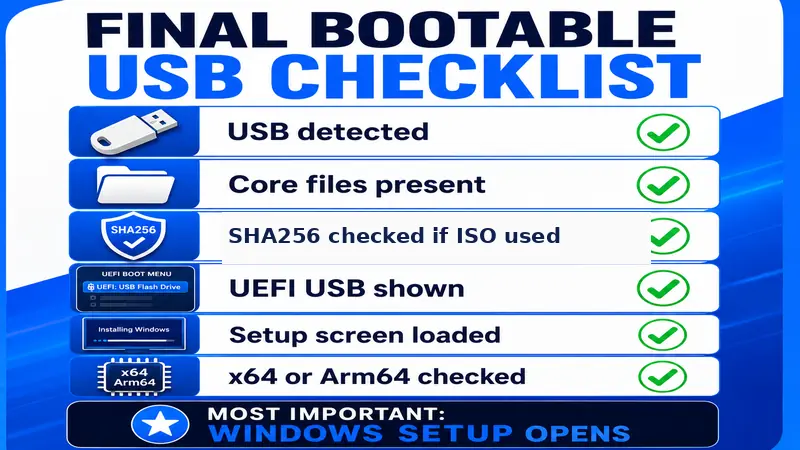
If you remember only one rule from this bootable USB test, make it this one: the strongest practical confirmation is reaching the first Windows Setup screen after booting from the USB. Earlier checks are useful because they narrow down where a problem might be, but they do not completely replace an actual attempt to check whether the USB boots.
❓ Frequently Asked Questions
Q. If setup.exe is on the USB, does that pass the bootable USB test?
A. No. setup.exe confirms that the drive contains a Windows Setup launcher, but it does not prove that UEFI boot files, the rest of the installation media, and the USB hardware are all working correctly. Boot from the drive and confirm that Windows Setup appears; that is the point where you verify the USB can boot.
Q. If the USB appears in the Boot Menu, is the bootable USB test complete?
A. Not yet. It is a strong sign because the firmware recognizes the drive as a boot candidate. The final practical check is Windows Setup boot verification after you select it.
Q. Can I exit as soon as the Windows Setup screen appears?
A. Yes. If your goal is only to verify the USB, there is no need to choose a disk, delete partitions, or start the installation. Reaching the first Windows Setup screen is enough for the practical bootable USB test.
Q. If the ISO SHA256 matches, does that prove the USB is good?
A. No. A matching SHA256 verifies the downloaded ISO, not the USB-writing process or the health of the flash drive. You still need to complete the bootable USB test on the finished drive.
Q. What if the Boot Menu shows only the USB name and not “UEFI”?
A. Firmware labels vary by manufacturer. If the firmware shows separate UEFI and legacy entries for the same USB, choose the UEFI entry for a normal Windows 11 installation. If the USB does not appear at all, check the media-creation process and the manufacturer’s USB boot settings.
Q. Windows Setup loads, but my SSD is missing. Should I recreate the USB?
A. Not immediately. If Setup loads correctly, the bootable USB test has already passed the most important boot stage. Missing SSDs are often a separate issue involving BIOS storage detection, Intel RST/VMD, or storage-controller drivers.
Conclusion: Finish the Bootable USB Test at the Windows Setup Screen
A Windows installation USB should not be judged only by what File Explorer can see. The most useful sequence is USB detection → core installation files → UEFI Boot Menu → Windows Setup. That order tells you not only whether the media looks correct, but also how far the PC can actually get when booting from it.
If you created the drive from a downloaded ISO, compare its SHA256 value with Microsoft’s official value. If the target computer is a Windows on Arm device, also make sure the media architecture matches the PC.
For a final bootable USB test, the key result is simple: if the PC boots from the USB and reaches the first Windows Setup screen, the bootable USB test has confirmed that the USB boot process works on that machine. If SSD detection, GPT/MBR, or storage-driver errors appear after that point, troubleshoot those as installation-stage problems rather than automatically blaming the USB.
Next in the series: How to Create a Windows 11 Bootable USB with Media Creation Tool and Rufus