How to Format a Bootable USB for Windows 11 | FAT32 vs NTFS
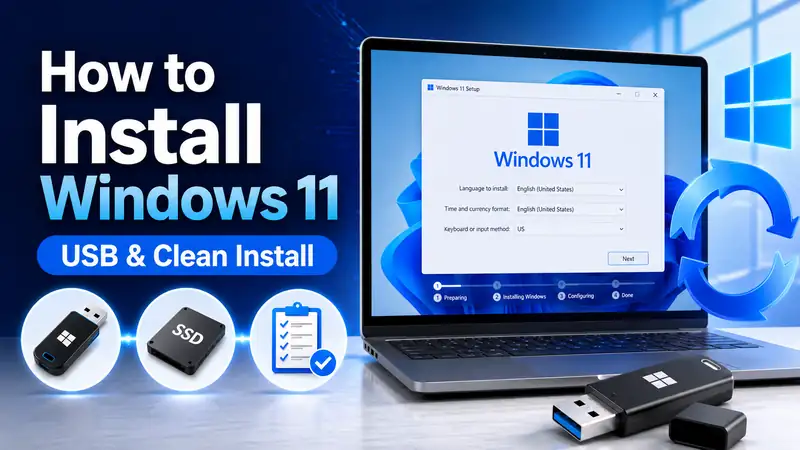
If you need to format a bootable USB in Windows 11, the first thing to understand is that formatting and creating bootable installation media are not the same job. Formatting rebuilds the USB drive’s file system and removes its existing data. It does not, by itself, turn the drive into a Windows installer.
If you plan to use Microsoft’s Media Creation Tool, you normally do not need to format a bootable USB as FAT32 or NTFS first. Microsoft recommends a blank USB flash drive with at least 8 GB of space, and the tool erases the drive while creating Windows installation media. Manual formatting matters more when you are copying files from an ISO yourself or returning an old installer USB to normal storage use.
This guide covers: how to format a bootable USB safely in Windows 11, when to choose FAT32, NTFS, or exFAT, the difference between quick and normal formatting, what to do when install.wim is larger than 4 GB, and how to reuse an old Windows installation USB.
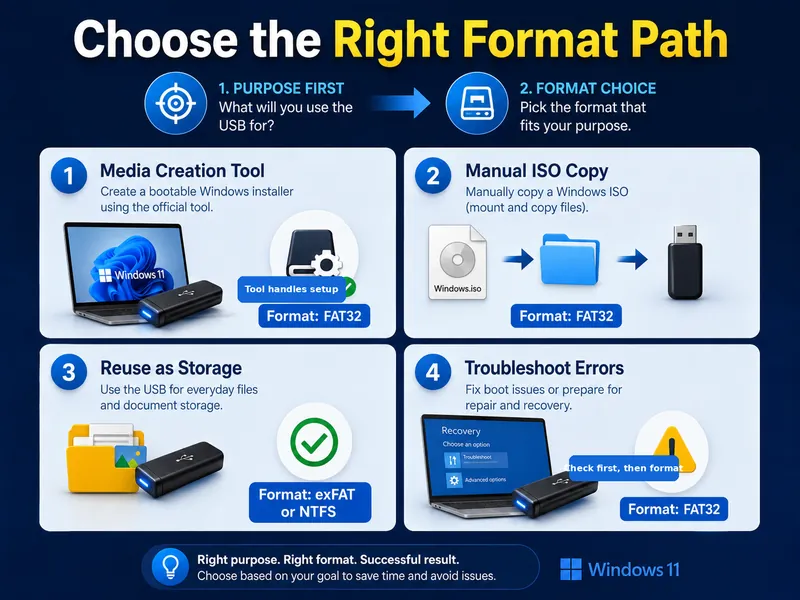
① Decide what the USB will be used for before you format it
Before you format a bootable USB, decide what the drive needs to do next. A USB that will become Windows installation media has different requirements from a USB that will only store documents, videos, or backups.
| Use case | Recommended approach | Why it matters |
|---|---|---|
| Create Windows 11 media with Microsoft’s official tool | Let Media Creation Tool handle the USB | The tool erases the drive and builds the installation media automatically. |
| Manually copy a Windows ISO to USB | Check FAT32 first for UEFI compatibility | Microsoft’s manual guide uses FAT32 so the drive can boot on BIOS- and UEFI-based PCs. |
| Return an old installer USB to normal storage | Choose NTFS or exFAT based on how you will use it | Large-file support and cross-platform compatibility matter more than boot compatibility. |
| Reset a USB that may be malfunctioning | Test another port or PC before formatting | Formatting cannot repair a physically failing flash drive. |
The most common mistake is formatting as FAT32 before choosing a method
If you are using Media Creation Tool, pre-formatting is usually unnecessary. On the other hand, if you format a bootable USB as FAT32 for ordinary storage, you may run into the 4 GB single-file limit. The safest order is simple: choose the purpose first, then choose the format.
② Before formatting, verify the drive letter and capacity twice
The biggest risk when you format a bootable USB is not choosing the “wrong” file system. It is formatting the wrong drive. If you format a bootable USB for reuse, the same identification check still applies. Before you start, compare the USB’s name, drive letter, and total capacity.
- Back up important files: formatting removes the files currently stored on the USB.
- Check the capacity: compare the drive shown in Windows with the approximate size printed on the USB, such as 16 GB, 32 GB, or 64 GB.
- Check the drive letter: confirm whether the USB is E:, F:, or another letter in File Explorer.
- Disconnect other removable drives: temporarily removing extra USB drives and external SSDs reduces the chance of selecting the wrong device.
- Save any custom recovery files: if the bootable drive also contains drivers, recovery tools, or personal files, copy them elsewhere first.
Microsoft’s Disk Management guide warns that formatting a volume destroys the data on that partition, so anything you want to keep should be backed up first.
Related guide: Windows 11 Backup Guide for Beginners
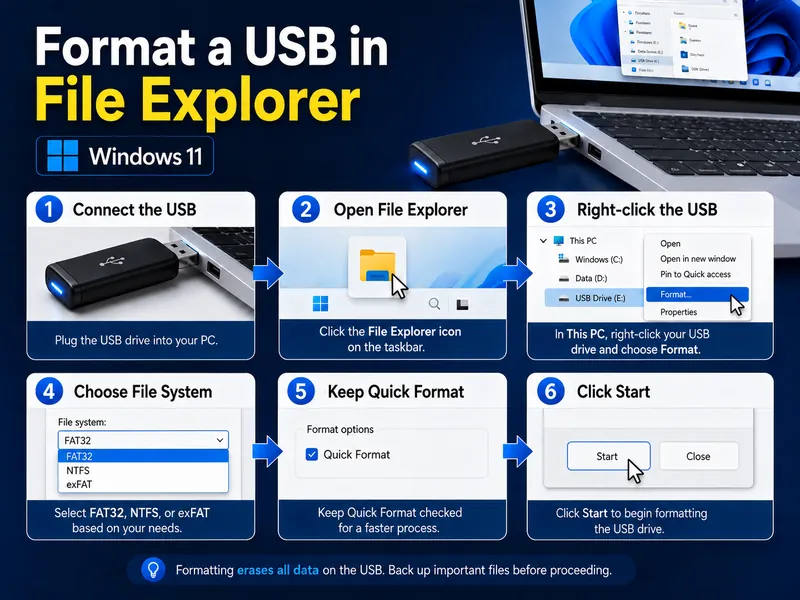
③ How to format a bootable USB in File Explorer
For most people, File Explorer is the easiest place to format a bootable USB that you want to reuse or prepare for another tool.
- Connect the USB flash drive to your PC.
- Press Windows + E to open File Explorer.
- Open This PC and confirm the USB’s name, drive letter, and capacity.
- Right-click the USB drive and select Format.
- Under File system, choose FAT32, NTFS, or exFAT based on the intended use.
- Leave Allocation unit size at its default unless you have a specific reason to change it.
- If the USB is healthy and you are simply reusing it, keep Quick Format selected.
- Check the drive letter and capacity one more time, then select Start.
- Read the data-loss warning and continue only if you selected the correct USB.
- When formatting is finished, open the drive and copy then delete a small test file.
Drive identification matters more than the file system choice
You can always format a bootable USB again later to change FAT32 to NTFS or exFAT. Accidentally formatting the wrong external SSD is a much bigger problem. Treat the drive letter and capacity check as the most important step.
④ FAT32 vs NTFS vs exFAT for a Windows bootable USB
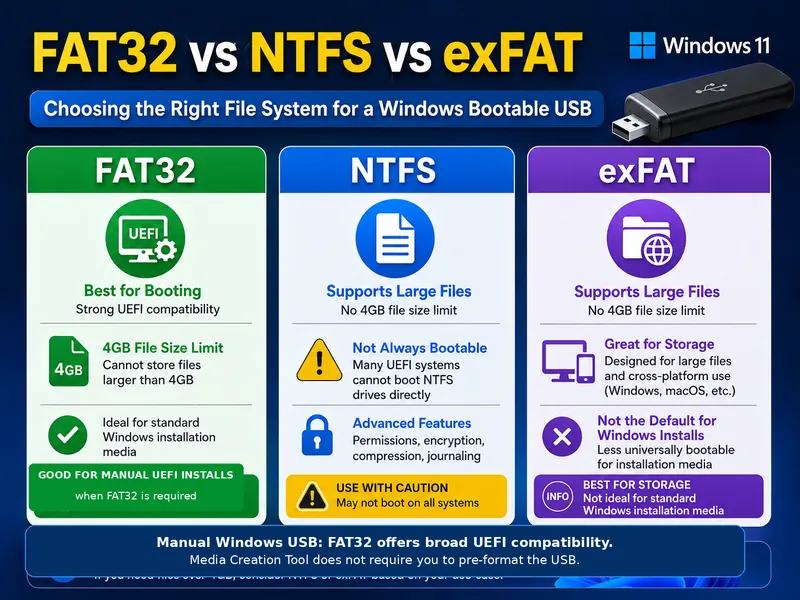
When you format a bootable USB, the file system determines how files are stored and which devices can read them. For Windows installation media, you also have to consider whether the PC’s firmware can boot from that file system.
| File system | Main advantage | Important limitation | Best fit |
|---|---|---|---|
| FAT32 | Strong BIOS and UEFI boot compatibility | 4 GB maximum size for a single file | Manual Windows installation USB when broad boot compatibility matters |
| NTFS | Supports files larger than 4 GB and works well in Windows | Not every UEFI firmware can boot directly from an NTFS USB | Windows-focused storage or tools that provide their own boot method |
| exFAT | Good large-file support and useful across Windows and macOS | Not the default choice for standard UEFI Windows installation media | General storage shared across multiple operating systems |
Why FAT32 still matters for a Windows installation USB
Microsoft’s manual Windows installation USB guide tells technicians to use FAT32 so the drive can boot on BIOS- or UEFI-based PCs. The trade-off is the 4 GB single-file limit, which becomes important if the ISO contains an install.wim larger than 4 GB.
⑤ Quick format vs normal format: which should you use?
If you format a bootable USB that has been working normally, quick format is usually the practical choice. Before you format a bootable USB this way, make sure the drive is healthy and correctly identified. The difference is not simply that one option is “fast” and the other is “slow.”
| Option | What it does | When to use it |
|---|---|---|
| Quick format | Creates a new file table without fully overwriting the whole volume | Reusing a healthy USB that does not need a deeper check |
| Normal format | Takes longer and performs a more complete erase/check process | When you want a more thorough format process and have time to wait |
Microsoft explains that quick format creates a new file table but does not fully overwrite the volume. It is much faster than a normal format. Neither option repairs physically damaged flash memory, so repeated I/O errors or disconnects should be treated as a possible hardware problem.
⑥ Using Media Creation Tool? You do not need to pre-format the USB
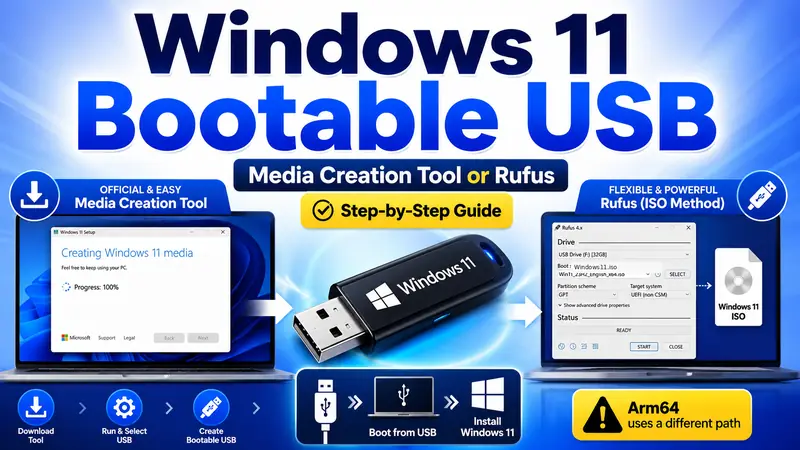
If your goal is simply to create official Windows 11 installation media, you normally do not need to format a bootable USB manually first. Microsoft’s tool handles the media-creation process for you.
- Prepare a blank USB flash drive with at least 8 GB of space.
- Open Microsoft’s Download Windows 11 page.
- Under Create Windows 11 Installation Media, download and run Media Creation Tool.
- Choose to create installation media and select USB flash drive.
- Select the correct USB and allow the tool to erase and configure it.
- When the process finishes, safely eject the drive and test whether the PC can see it in the boot menu.
Microsoft’s Create installation media for Windows page currently specifies a blank USB flash drive with at least 8 GB and notes that existing content on the drive is deleted. In this workflow, choosing FAT32 or NTFS manually before you start is not the key step.
Next in the series: How to Create a Windows Bootable USB — Step-by-Step Guide
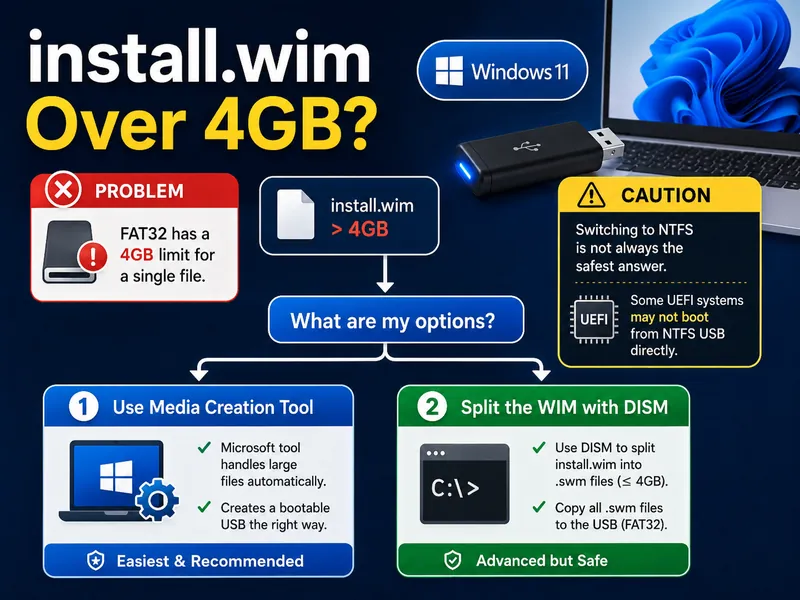
⑦ What if install.wim is larger than 4 GB?
This issue matters mainly when you format a bootable USB as FAT32 and then manually copy the contents of a mounted Windows ISO. FAT32 cannot store a single file larger than 4 GB, so a large sources\install.wim will not copy to the drive.
Microsoft documents a supported workaround: split the WIM image into smaller .swm files with DISM. Windows Setup can use the split files automatically when they are placed together in the correct folder.
Dism /Split-Image /ImageFile:D:\sources\install.wim /SWMFile:E:\sources\install.swm /FileSize:3800In this example, D: represents the mounted Windows ISO and E: represents the USB. Your drive letters may be different. Never paste the command blindly—check the actual letters on your own PC first.
Beginners do not need to force this method. If you only need a standard Windows 11 installer, Media Creation Tool is much simpler than manually splitting WIM files.
Do not switch to NTFS without checking how the USB will boot
If FAT32 blocks a large WIM file, it can be tempting to format a bootable USB as NTFS and move on. However, some UEFI firmware cannot boot directly from NTFS. For a manual Microsoft-style setup, splitting the WIM or using Media Creation Tool is generally safer than assuming every PC will boot an NTFS installer.
⑧ How to turn an old Windows installer USB back into normal storage
After Windows installation is finished, you can format a bootable USB again and use it as a normal flash drive. This is one of the most common reasons people format a bootable USB after a Windows reinstall.
- Make sure there are no installation, recovery, or personal files you still need.
- Open File Explorer → This PC.
- Right-click the USB and choose Format.
- Choose NTFS if the drive will mainly be used with Windows, or consider exFAT if you frequently move large files between Windows and macOS.
- Leave allocation unit size at the default and use quick format if the drive is healthy.
- Afterward, create a test folder and confirm that copying and deleting files works normally.
If the USB shows much less capacity than expected, check Disk Management
Some bootable-USB tools create multiple partitions. In that case, a simple File Explorer format may not restore the entire drive capacity. Right-click Start → Disk Management and check how many partitions are on the USB.
Formatting an existing volume is straightforward, but deleting partitions and creating a new volume changes the drive structure and erases data. If you are not completely certain which disk is the USB, stop before making structural changes.
For beginners, DiskPart’s clean command should not be the first troubleshooting step. Selecting the wrong disk can remove partition information from another storage device.
⑨ What to do if Windows says it cannot complete the format
If Windows cannot format a bootable USB, do not keep repeating the same attempt. Before you try to format a bootable USB again, first separate a file-system problem from a port, connection, or hardware problem.
- Disconnect the USB and plug it directly into a different USB port.
- Close any files, apps, or File Explorer windows that are using the drive.
- Open Disk Management and check whether the volume appears normally.
- Try the same USB on another Windows PC.
- If the drive has a physical write-protect switch, make sure it is unlocked.
- If you repeatedly see I/O errors, disconnects, or a 0-byte capacity, consider replacing the USB.
Formatting rebuilds a file system; it does not repair failing flash memory. For important Windows installation media, a reliable replacement USB is usually a better choice than repeatedly trying to format a bootable USB that is already showing hardware-like errors.
⑩ How to check the USB after formatting
- Check the file system: right-click the USB → Properties and confirm that FAT32, NTFS, or exFAT matches what you intended.
- Check the capacity: make sure Windows reports roughly the expected usable size.
- Run a write test: copy a small test file to the drive and delete it.
- Remember that formatting alone is not enough: a freshly formatted USB is not automatically bootable.
- If it is supposed to be installation media: confirm that the firmware’s Boot Menu shows the UEFI USB entry and that Windows Setup actually starts.
Next guide: How to Check a Windows Bootable USB — Beginner-Friendly Verification Steps
Need to change the boot order? Windows Bootable USB Settings Guide — UEFI, Boot Menu, and Boot Order
USB still will not boot? Windows Bootable USB Troubleshooting Guide — Detection, UEFI, SSD, and Startup Errors
⑪ Mistakes to avoid when formatting a Windows bootable USB
- Do not assume formatting makes a USB bootable. You still need Windows installation files and a valid boot structure.
- Do not rely on the drive letter alone. Check the drive name and capacity before you format a bootable USB.
- Do not repeatedly pre-format before using Media Creation Tool. The official tool handles the installation-media setup itself.
- Do not assume FAT32 is always the best file system. NTFS or exFAT may be more convenient for normal storage.
- Do not assume every UEFI PC can boot from NTFS. Firmware support varies.
- Do not keep using an unreliable USB for Windows installation. File corruption or disconnections can interrupt setup.
- Do not make DiskPart
cleanyour first solution. A wrong disk selection can cause serious data loss.
❓ Frequently Asked Questions
Q. Do I have to format a bootable USB as FAT32 for Windows 11?
A. Not always. If you use Microsoft Media Creation Tool, you generally do not need to format a bootable USB manually before creating the installation media. If you are manually copying Windows installation files from an ISO, FAT32 is the first format to consider for broad BIOS/UEFI boot compatibility.
Q. Is FAT32 or NTFS better for a bootable USB?
A. It depends on the job. FAT32 offers strong UEFI boot compatibility but cannot store a single file larger than 4 GB. NTFS supports large files, but some UEFI firmware cannot boot directly from an NTFS-formatted USB.
Q. Is quick format safe for a normal USB?
A. If the USB has been working normally and you simply want to reuse it, quick format is usually practical. If you format a bootable USB only to return it to normal storage, quick format is often enough. It is not a secure erase method, and it does not diagnose or repair physical flash-memory failure.
Q. Why does a 64 GB USB not show FAT32 in Windows?
A. Windows’ built-in formatting interface may not offer FAT32 for larger volumes. If your only goal is to create Windows 11 installation media, using Media Creation Tool is usually easier than forcing a manual FAT32 format. For manual media, evaluate the USB layout, UEFI requirements, and the size of install.wim before choosing a workaround.
Q. Can I format a bootable USB and use it as a normal flash drive again?
A. Yes. If you no longer need the installer or recovery files, you can format a bootable USB again as NTFS or exFAT for regular storage. If the drive still shows reduced capacity, check Disk Management for leftover partitions.
Q. I formatted the USB, so why does it not appear in the Boot Menu?
A. A formatted USB is not automatically bootable. You need to create actual Windows installation media. If a finished installer still does not appear, check the UEFI boot entry, USB port, and whether the installation media was created successfully.
Conclusion | Format for the purpose, then create and verify the bootable media
The safest way to format a bootable USB is to follow the order purpose → file system → media creation → verification. If you are making official Windows 11 installation media, Media Creation Tool is usually the simplest route because you do not have to decide FAT32 vs NTFS in advance.
If you are building the installer manually, FAT32 remains important for UEFI compatibility, but its 4 GB single-file limit can affect install.wim. In that situation, Microsoft’s supported WIM-splitting method is safer than assuming NTFS will boot on every PC.
Before you format a bootable USB, always verify the drive letter and capacity and back up anything you need. That check matters every time you format a bootable USB, whether you are rebuilding installation media or returning the drive to normal storage. And remember the final rule: formatting is only preparation. The job is not finished until Windows installation media has been created and the USB successfully reaches Windows Setup from the Boot Menu.